Printing your design
Set up your print in the slicer, assign colors, and print.
This article assumes you have already exported your design and have it saved on your computer. If you haven't, please refer to the Exporting your design article.
1. Create a new project
Open your slicer and create a new project. In this example we are using Bambu Studio but the process is similar for other slicers.

2. Import your downloaded STL files
Next you'll have to add the STL files you previously downloaded. To do that click on "Import" in the Bambu menu and select all the files in the ZIP file.

3. Confirm Single object import
The slicer will ask you if your files are a single object with multiple parts. Click on "Yes" to continue.

4. Verify the import
Have a look at the preview in your slicer. Even before you assign the filament colors you should be able to see some of the details of your design.
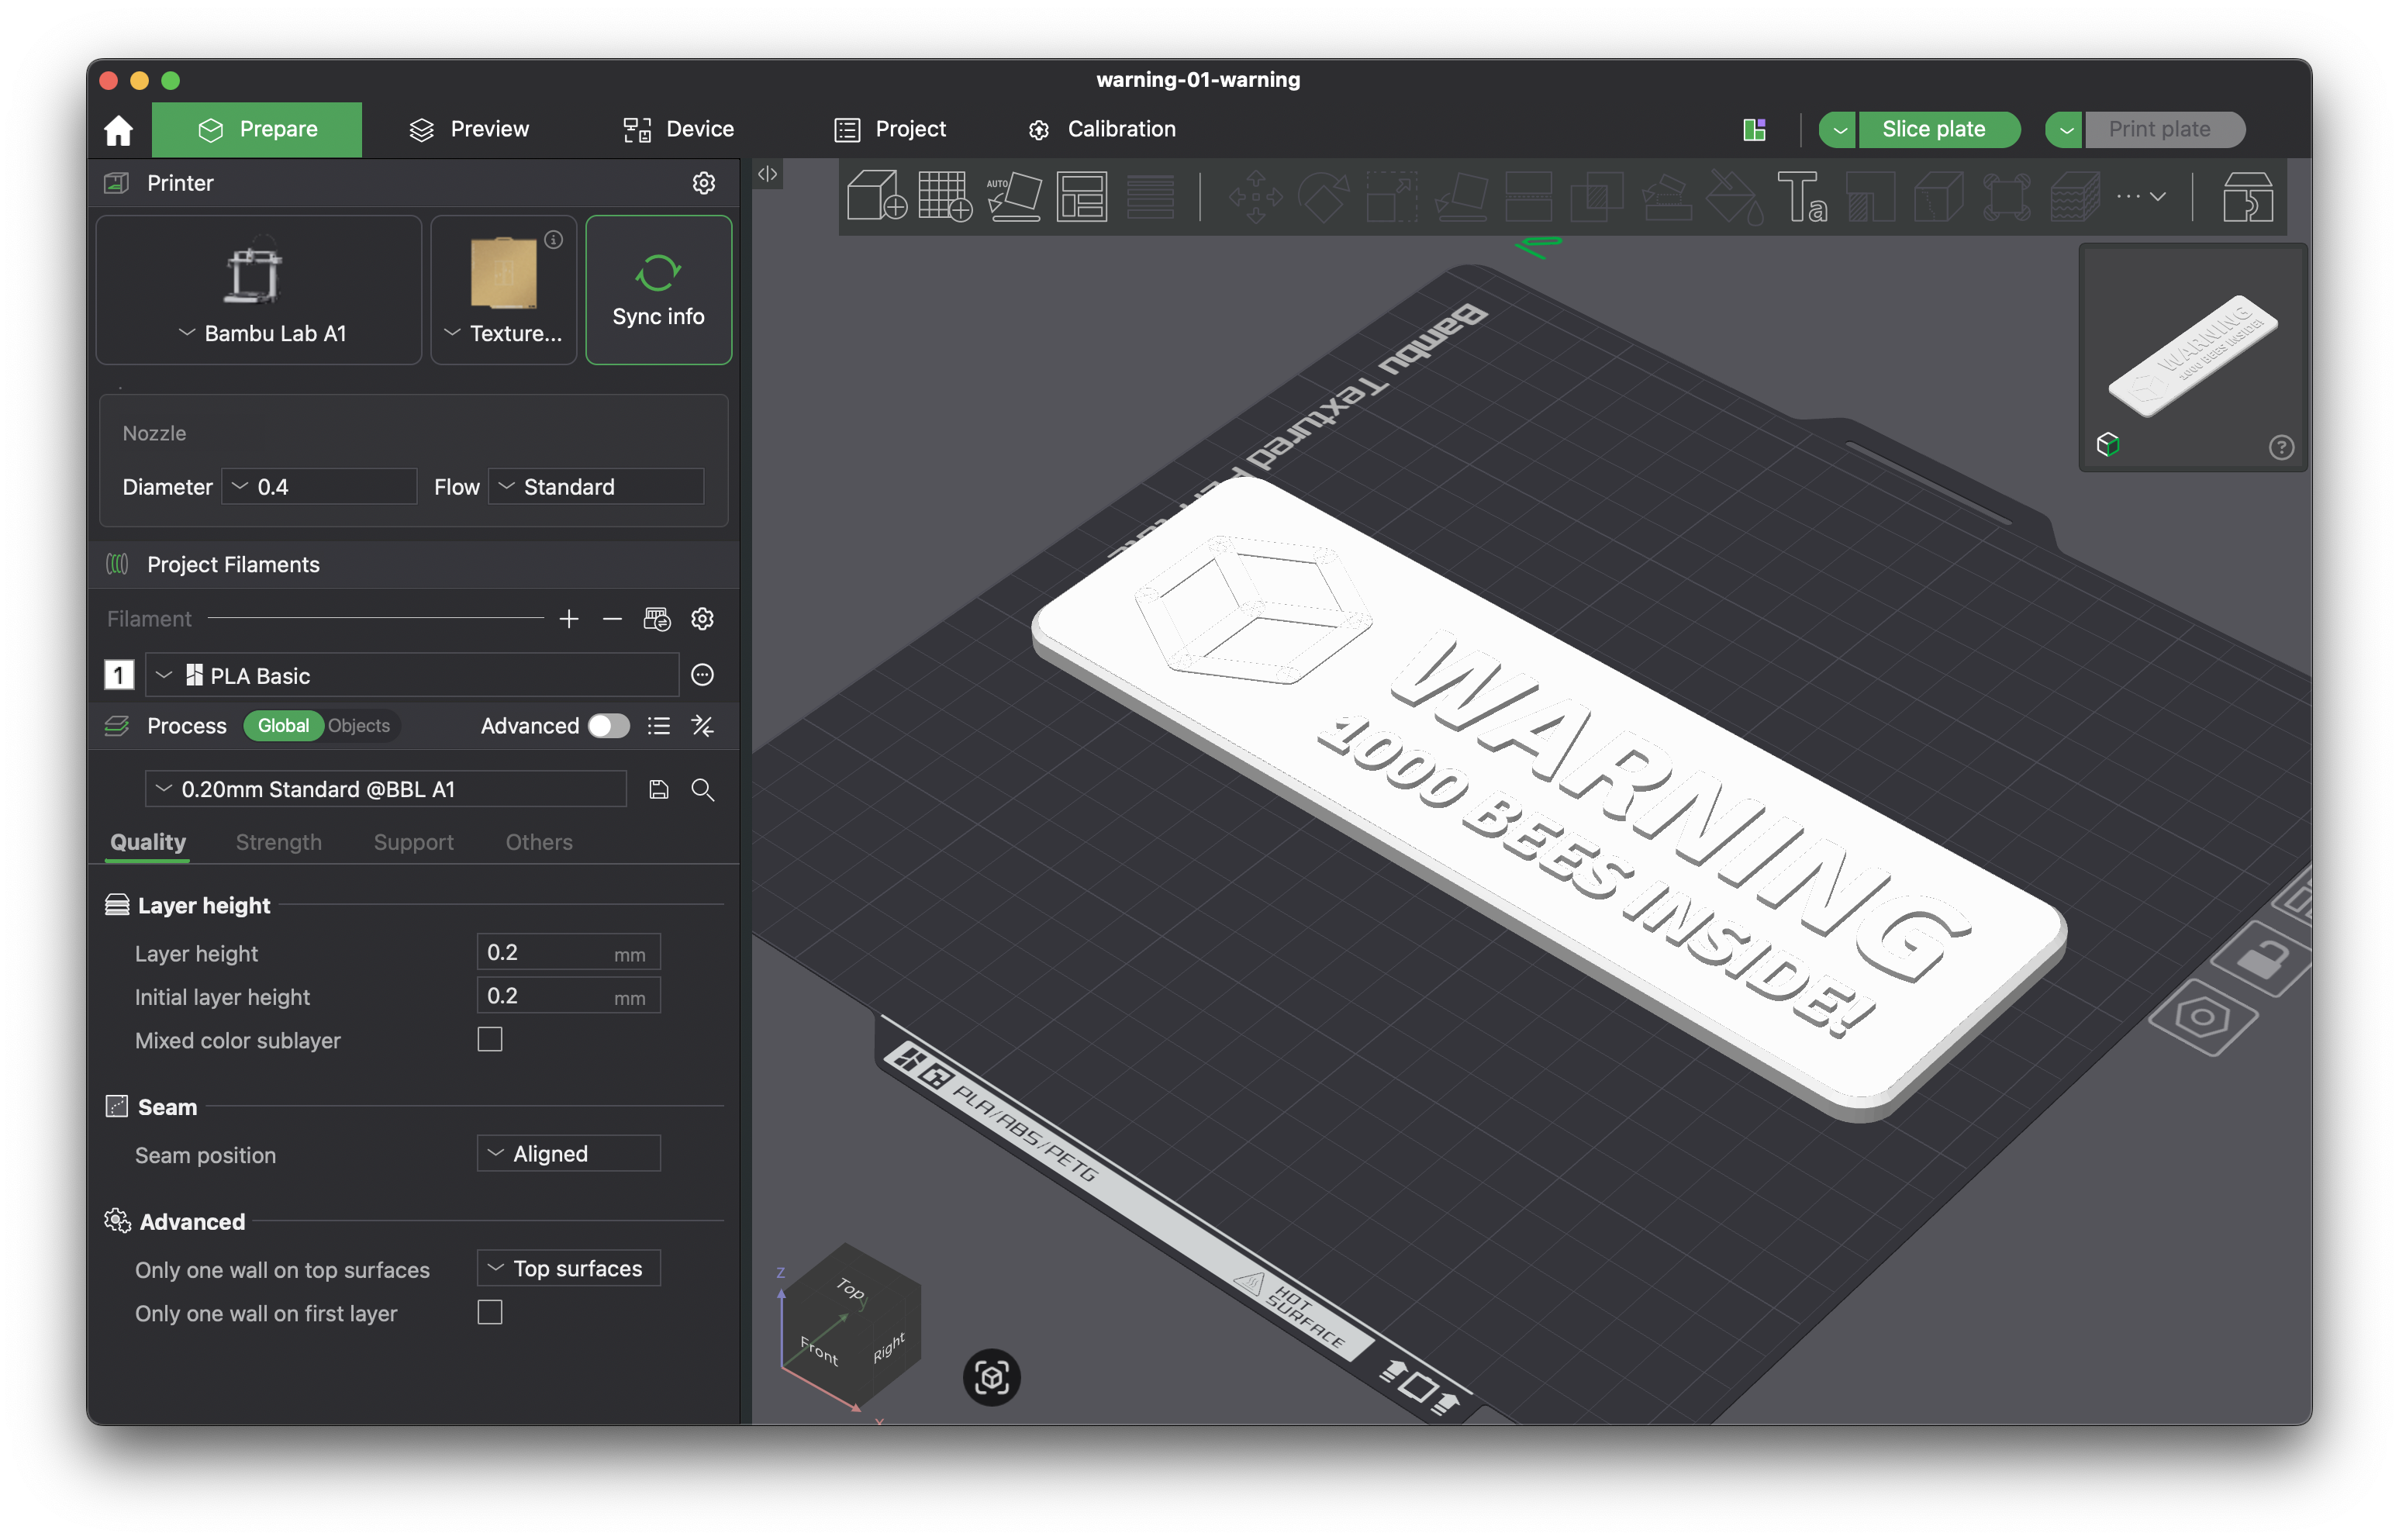
5. Setup at least two filament colors
You will need to print in at least two different filament colors to print your sign. You can add as many colors as you have parts but for now we will only use two.
On the left sidebar you will see the "Project Filaments" section. Click on the "+" button to add a new filament color.

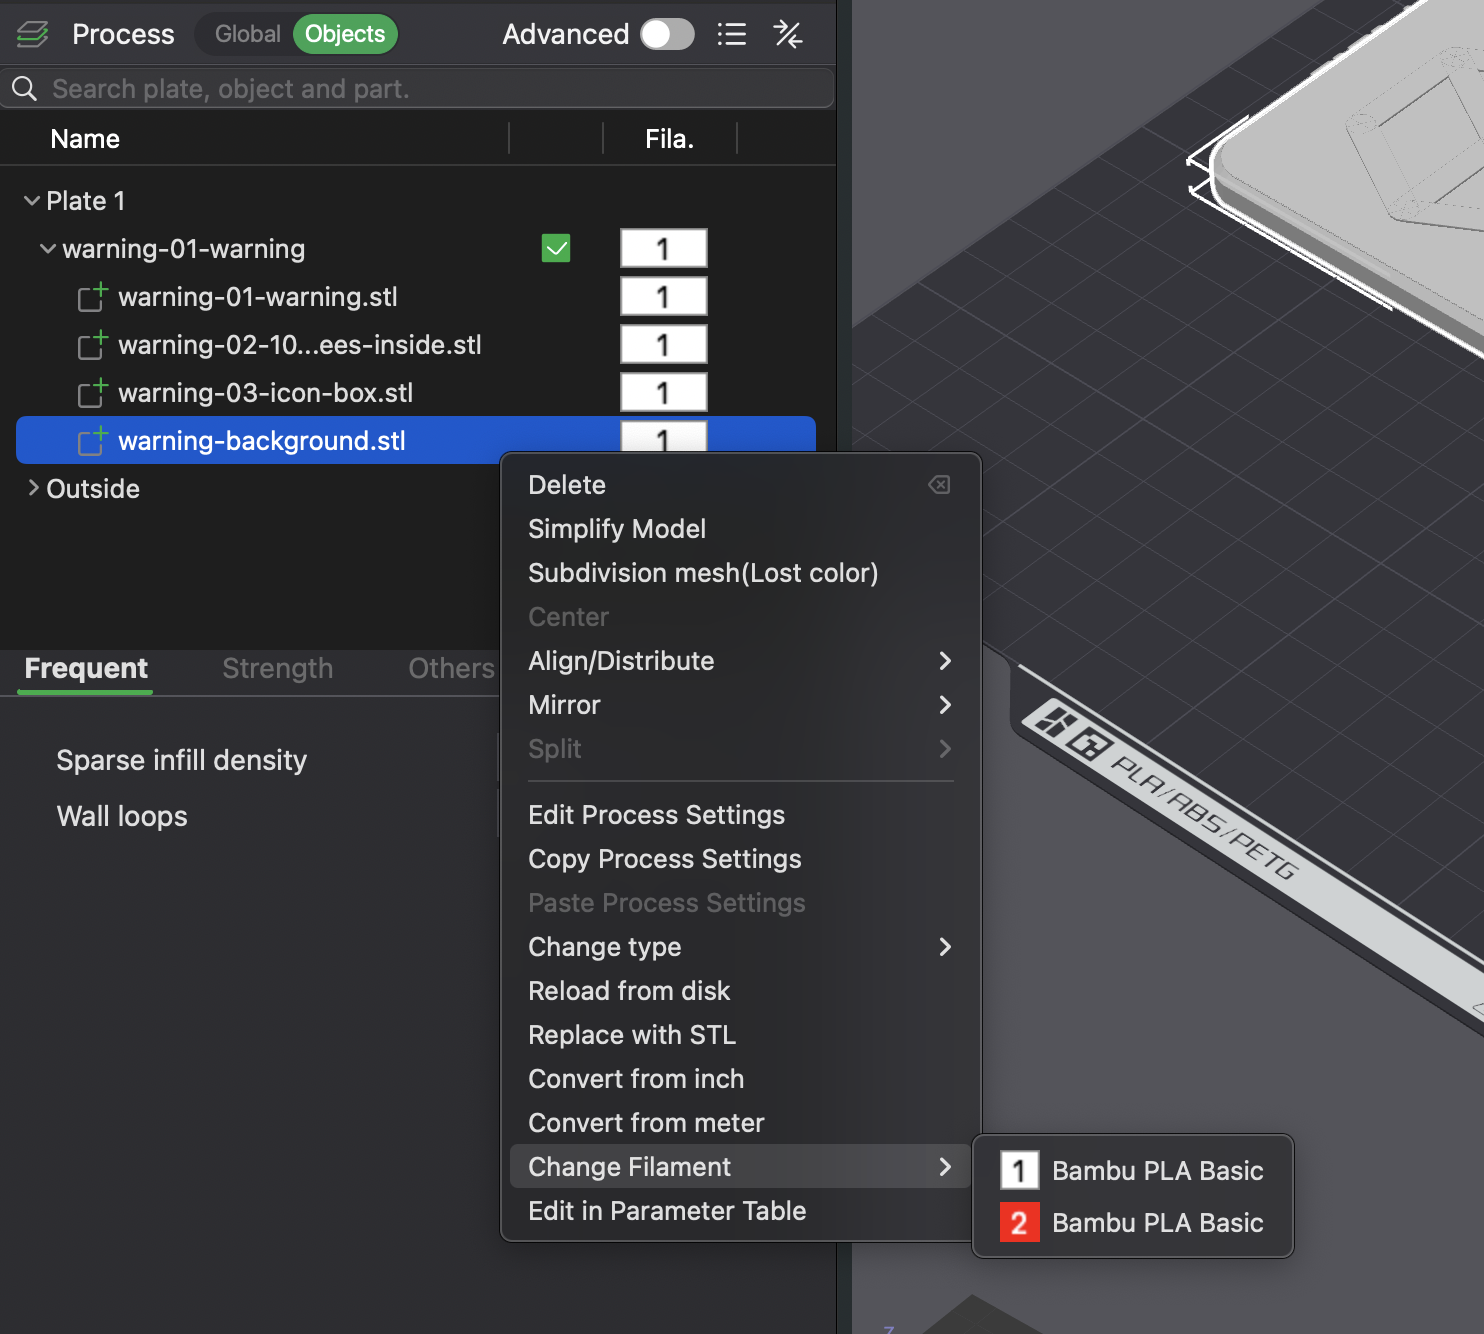
6. Assign filament colors to each object
Once you have at least two filament colors you will need to assign each object to a different color. In the "Process" settings click on the "Objects" tab and expand your object to see all parts. Then right click any of the parts and select "Change Filament".
The best part to start with is the background as it'll let you immediately see all the other parts in your sign.
7. Verify result
Once you have assigned the filament colors you should be able to see the different colors in the preview. You can now adjust the colors and filaments for all of your parts.
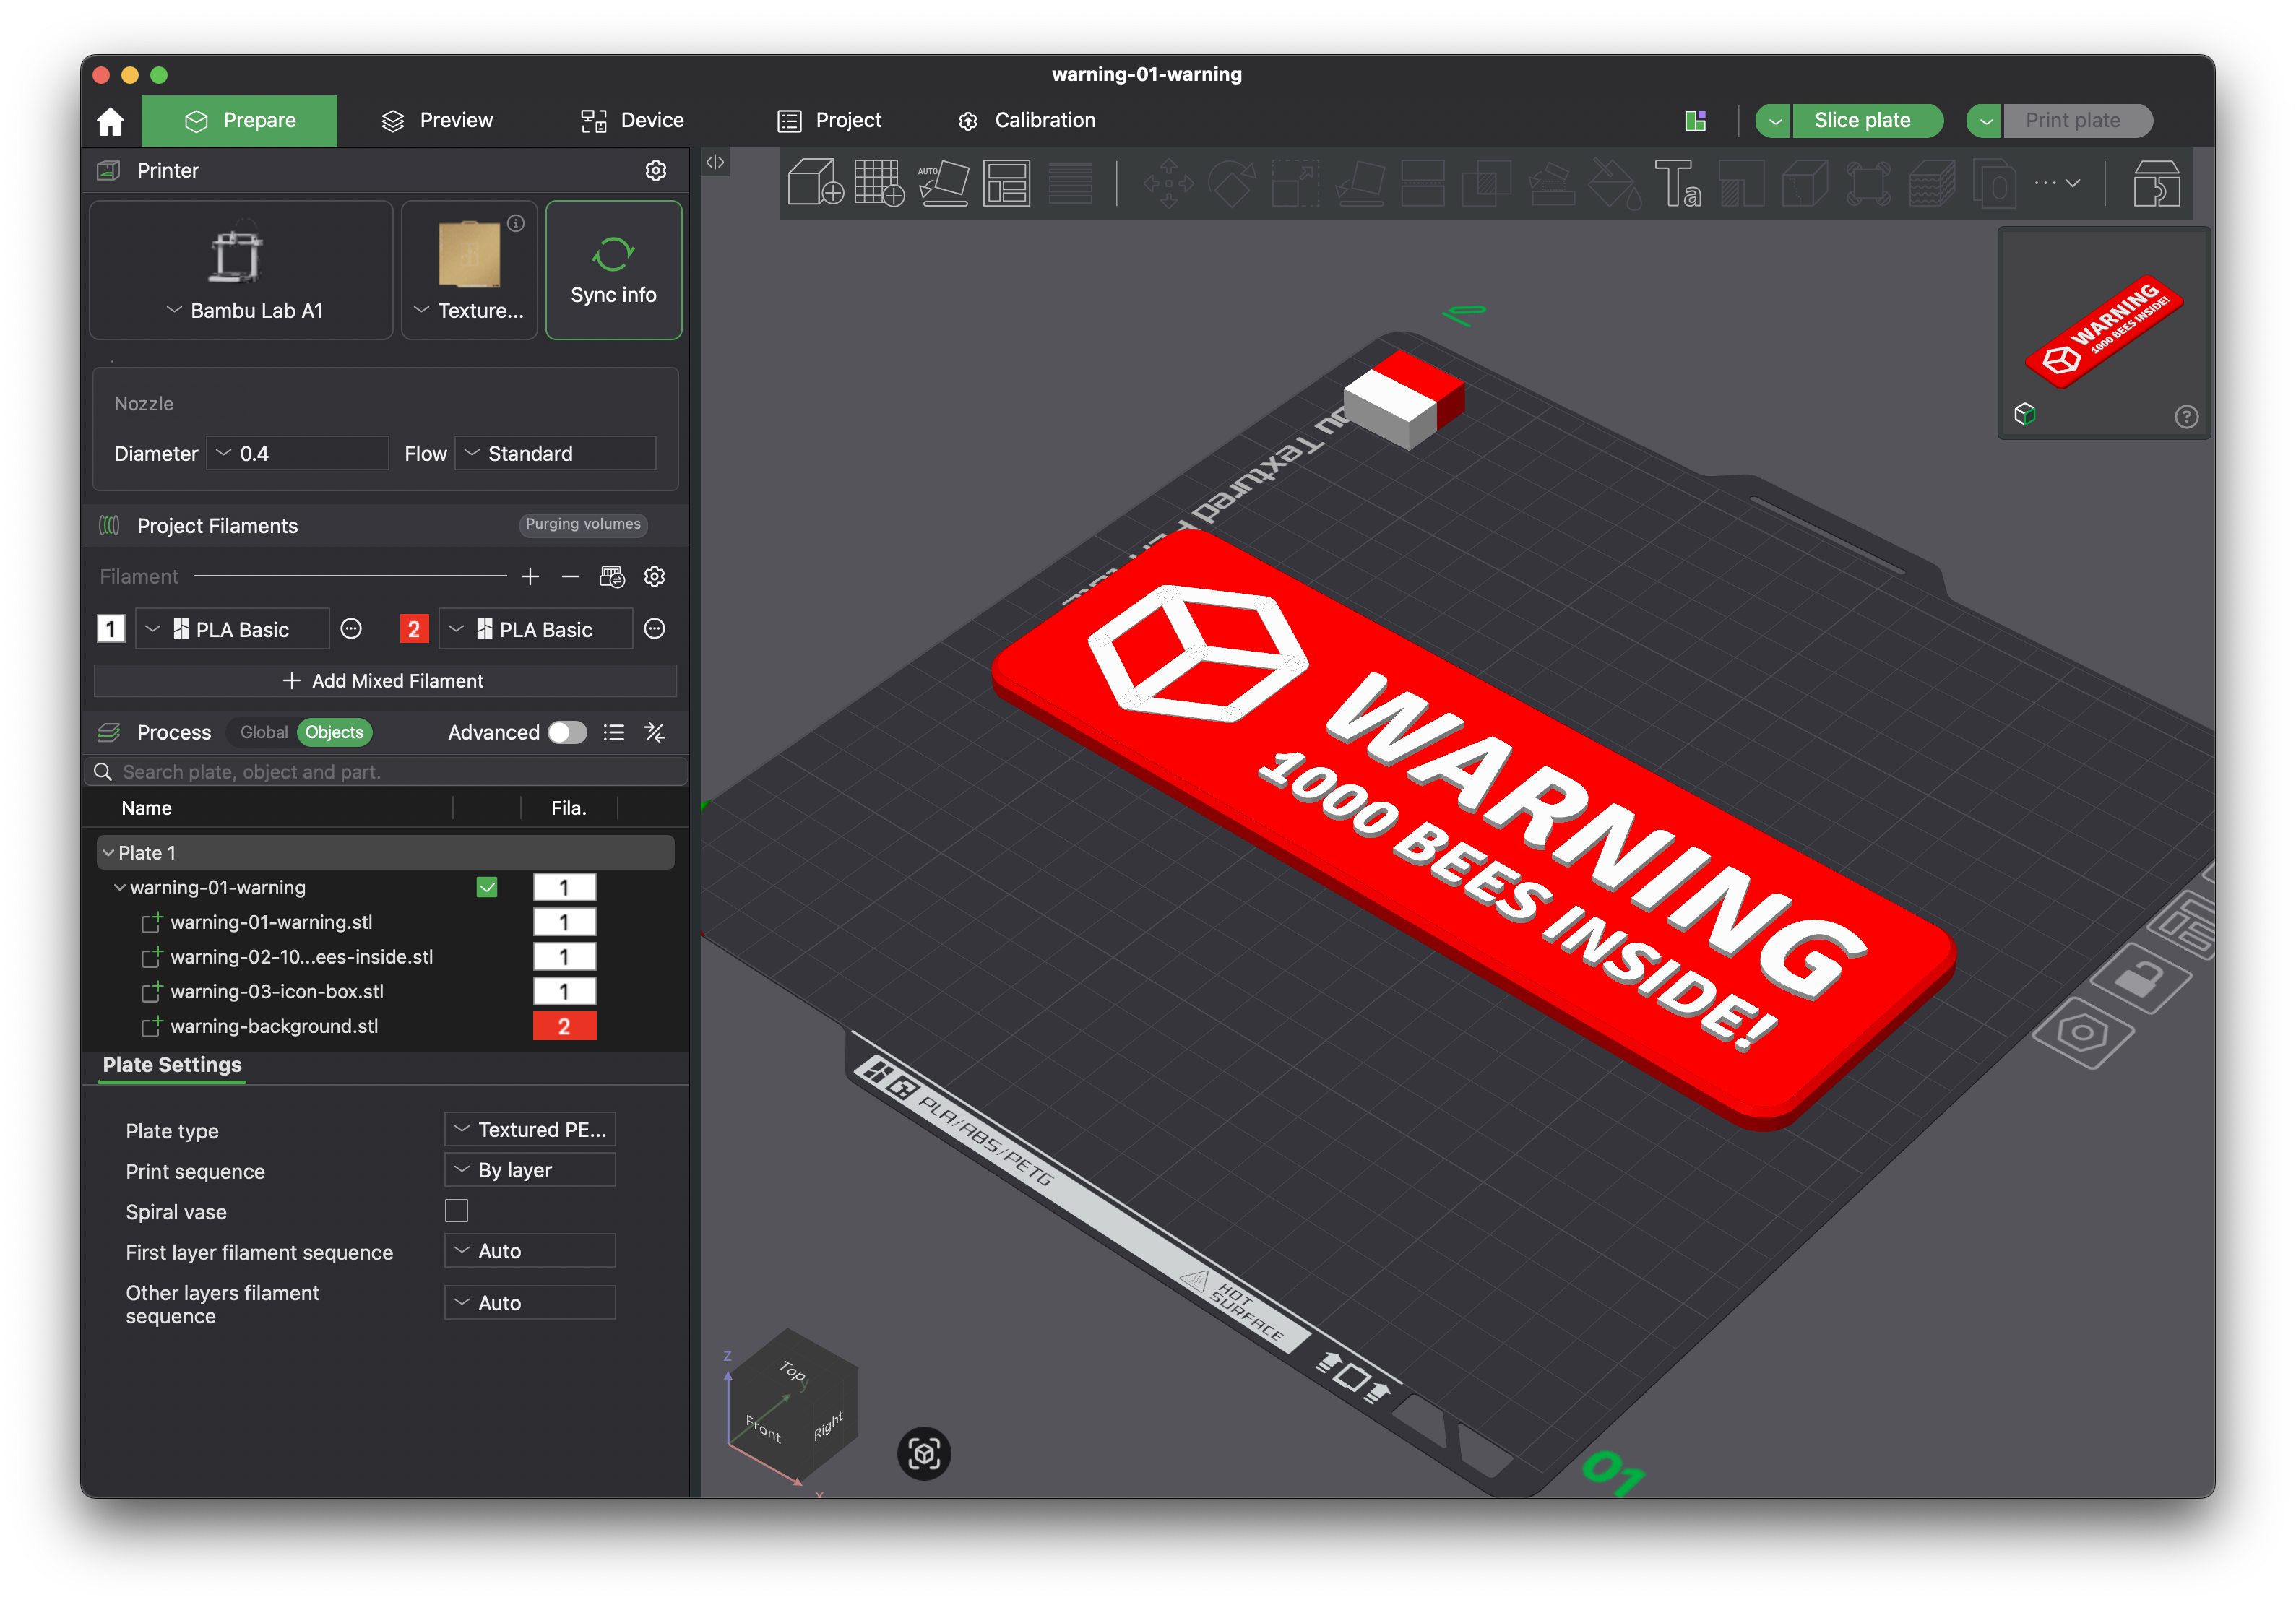
8. Slice and print
Once you are happy with your settings, click "Slice plate" and check the sliced preview one last time. Then click "Print plate" to start the print.
No multi-material printer? You can still print in two colors: when your text and icons are raised above the sign surface, the color changes at a single layer height — add a "pause" or "change filament" marker at that layer in your slicer and swap the spool when the printer stops. See the FAQ.